To fill a pre-rolled cone: grind your material to medium consistency, hold the cone upright, add material in small amounts, gently tamp down every few pinches using a packing tool, continue layering and packing until ¼ inch from the top, then twist the end shut. The key is firm but not tight packing for optimal airflow and even burning.
Pre-rolled cones have revolutionized the smoking experience, eliminating the steep learning curve of traditional rolling while delivering consistent, professional results every time. Whether you’re a complete beginner or looking to perfect your technique, mastering the art of filling pre-rolled cones ensures smooth draws, even burns, and zero frustration.
At LeafPalms, we specialize in premium natural pre-rolled wraps, pre-rolled tubes, and pre-rolled cones made from tobacco-free materials like palm leaves, rose petals, and lotus flowers. This comprehensive guide will walk you through every step of the cone-filling process, from material preparation to the perfect twist, ensuring your smoking sessions are always smooth and satisfying.
Why Pre-Rolled Cones Are Game-Changers
The Convenience Revolution
Traditional hand-rolling requires practice, patience, and a steady hand—skills that can take months or even years to develop. Pre-rolled cones eliminate this barrier entirely, offering:
Zero Learning Curve – If you can fill, you can roll Perfect Shape Every Time – Professionally crafted cone design Built-In Filter – No need to fold or craft crutches Consistent Burns – Even combustion from start to finish Time-Saving – Fill and enjoy in under 2 minutes Perfect for Sharing – Impressive presentation without the stress
Natural Materials Make the Difference
While standard paper cones serve their purpose, natural wraps like Rose Wraps, Lotus Cones, and Leaf Palms offer superior experiences:
Tobacco-Free – Zero nicotine, zero harsh chemicals Slower Burning – Natural materials burn cooler and longer Better Flavor – No paper taste interfering with your herbs Eco-Friendly – Biodegradable and sustainably sourced
What You’ll Need: Essential Supplies
Before you begin, gather these items for the smoothest filling experience:
Required Materials:
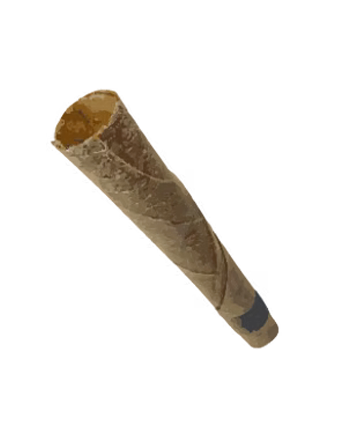
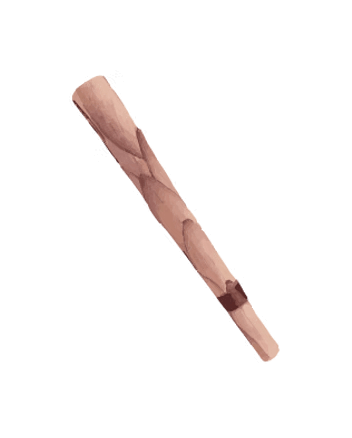
Pre-Rolled Cones – Choose from Pre-Rolled Cones, Pre-Rolled Tubes, or Pre-Rolled Wraps
Your Material – High-quality, properly cured herbs
Grinder – Essential for consistent particle size
Packing Tool – Included with most cone packs, or use:
Bamboo skewer
Chopstick
Pen (remove ink first)
Official cone packing stick
Rolling Tray – Catches spills and keeps workspace organized
Optional: Small Funnel – Makes filling easier for beginners
Step 1: Prepare Your Material – The Foundation of Success
Achieving the Perfect Grind
The consistency of your ground material directly impacts how well your cone burns. Here’s the science behind the perfect grind:
TOO FINE (Powder-like)
Restricts airflow Clogs the cone Difficult to draw through Can pull through a filter
TOO COARSE (Chunky)
Creates air pockets Uneven burning “Tunneling” effect Harsh, hot smoke
JUST RIGHT (Medium/Fluffy)
Optimal airflow Even, consistent burn Smooth draws Perfect pack density
Grinding Best Practices:
Break apart large pieces by hand first
Remove stems and seeds – they cause harsh smoke and uneven burns
Grind in short bursts – Don’t over-process
Check consistency – Should feel fluffy and slightly springy
Don’t grind too far ahead – Best when fresh to preserve flavor
Moisture Matters:
Too Dry:
Burns too hot and fast
Harsh throat hit
Loses flavor quickly
Too Moist:
Won’t stay lit
Uneven burning (“runs”)
Difficult to pack
Perfect Balance:
Slightly springy to touch
Holds form when pinched
Not crumbly, not sticky
Pro Tip: If the material is too dry, add a humidity pack to your storage container for 24 hours. If too moist, spread on a tray for 10-15 minutes at room temperature.
Step 2: Set Up Your Workspace
Create a Spill-Free Zone:
Use a rolling tray – Ideally with raised edges to contain material
Choose good lighting – You need to see what you’re doing
Stable surface – No wobbly tables
All supplies within reach – Grinder, cones, packing tool ready
Cone Preparation:
Before filling, inspect your pre-rolled cone:
Check for tears or damage Ensure the filter is secure Gently tap to open the cone fully Verify paper is expanded to full diameter
For natural wraps like Rose Cuts or Fruit Cuts, handle gently as they’re more delicate than paper.
Step 3: The Filling Technique – Layer by Layer
The Professional Method:
This is where most beginners go wrong. Follow this proven technique for perfect results every time:
Phase 1: Initial Fill (Bottom Third)
Hold cone upright by the filter end
Add small amount – Just a pinch or small scoop
Tap gently on surface – Settles material to bottom
Light tamp – Use packing tool to compress slightly
Repeat – Continue until bottom third is filled
Critical Rule: Never fill more than ⅓ at once before packing
Phase 2: Middle Fill (Middle Third)
Continue adding – Still in small increments
Pack as you go – Gently compress every few pinches
Check density – Should feel firm but not rock-hard
Rotate cone – Ensures even distribution
No bulging – Cone should maintain uniform shape
The “Firm Pillow” Test: Press gently on the side—should give slightly but bounce back
Phase 3: Top Fill (Final Third)
Leave ¼ inch space at the top – Room for twisting
Final layer should be slightly looser
Gentle final tamp – Don’t over-compress the top
Check draw – Take an unlit pull to test airflow
Adjust if needed – Add or remove material
Step 4: Perfect Packing Pressure
Understanding Pack Density:
The most common mistake is either under-packing or over-packing. Here’s how to nail it:
Under-Packed Symptoms:
Cone feels soft and caves in when squeezed
Material shifts when rotated
Burns unevenly or “runs”
Contents fall out when tipped
Over-Packed Symptoms:
Impossible to draw through
Feels like sucking through a brick wall
Goes out constantly
Requires constant relighting
Perfect Pack Indicators:
Firm but not hard – Like a firm pillow Smooth draw – Slight resistance but easy pull No movement – Material doesn’t shift Maintains shape – No dents from packing tool Consistent density – Uniform from bottom to top
The Three-Finger Test:
Gently pinch the cone between three fingers along its length:
Bottom: Firmest (most compression)
Middle: Moderate firmness
Top: Slightly looser for twist closure
Step 5: Closing Your Cone – Two Professional Methods
Method 1: The Classic Twist (Easiest)
This is the standard approach used by 95% of smokers:
Easier lighting than twisted tops Professional appearance Better seal for long-term storage
Works best with: Rose Wraps and Lotus Cones
Pro Tip: Dutch crowns require firmer packing throughout—if packed loosely, you’ll have too much empty space at the top to fold properly.
Common Mistakes and How to Fix Them
Problem: Cone Won’t Stay Lit
Causes:
Material too moist
Packed too tight
Uneven packing
Solutions:
Let material dry slightly
Repack with less pressure
Use layered packing method
Problem: Burns Too Fast/Hot
Causes:
Material too dry
Packed too loose
Grind too fine
Solutions:
Use fresher material
Pack more firmly
Coarser grind
Problem: “Canoeing” (Uneven Burn)
Causes:
Uneven density throughout
One side packed tighter
Lighting technique
Solutions:
Rotate while packing
Check density by pinching all sides
Light evenly by rotating
Problem: Harsh Smoke
Causes:
Stems not removed
Material too dry
Packed too tight near filter
Solutions:
Better material prep
Proper moisture content
Looser pack near bottom
Problem: Material Falls Out
Causes:
Under-packed
Too coarse grind
Cone damaged
Solutions:
Pack more firmly
Medium grind consistency
Inspect cones before filling
Advanced Tips for Perfect Cones Every Time
The Pre-Fill Check:
Before you start filling:
✓ Tap test: Tap cone on surface—should maintain shape ✓ Draw test: Pull through empty cone—air should flow freely ✓ Inspect filter: Ensure it’s secure and properly seated ✓ Check material: Verify grind consistency and moisture
The Post-Fill Quality Control:
After filling but before closing:
✓ Roll test: Place on flat surface—should roll smoothly without wobbling ✓ Pinch test: Gently pinch along entire length—check for soft spots ✓ Draw test: Take 2-3 unlit pulls—should have slight resistance but easy flow ✓ Visual check: Look down from top—material should be level
Standard 1¼ size cones typically hold 0.5-0.75g. King size cones hold 0.75-1.0g. Exact amount depends on grind consistency and pack density.
Can I reuse a cone if I empty it?
Not recommended. The paper/material becomes brittle and may tear. Always use fresh pre-rolled cones for best results.
What if I don’t have a packing tool?
Use a chopstick, bamboo skewer, or the end of a pen (remove ink cartridge first). Just ensure it’s clean and smooth.
How tight should I twist the end?
Just tight enough to seal—about 2-3 rotations. Over-twisting restricts airflow and makes lighting difficult.
Can I fill cones ahead of time?
Yes! Store in airtight containers in cool, dark places. Best consumed within 7 days for optimal freshness.
Why does my cone keep going out?
Usually due to: material too moist, packed too tight, or inconsistent density. Try repacking with drier material and less pressure.
What’s the best size cone for beginners?
Standard 1¼ size offers the best balance—large enough to work with comfortably but not so big that mistakes are costly.
Do natural wraps like Rose Palms require different techniques?
Slightly—they’re more delicate, so use gentler packing pressure. Otherwise, the same technique applies.
How do I prevent canoeing?
Ensure even packing throughout, rotate while packing, and light evenly by rotating the cone during ignition.
Can I mix different materials in one cone? Yes, but layer them: regular material on bottom and top, special additions (kief, concentrates) in the middle for best results.
Final Thoughts: Practice Makes Perfect
Mastering pre-rolled cone filling is a skill that improves with repetition. Your first few attempts might not be perfect, and that’s completely normal. The key is understanding the principles:
Remember the Core Concepts:
Medium grind consistency Layer in small amounts Pack gently as you go Firm but not tight Test airflow before closing
Whether you choose classic Pre Rolled Tubes, elegant Rose Palms, smooth Lotus Cones, or flavorful options like Blueberry and Strawberry, the filling technique remains fundamentally the same.
The beauty of pre-rolled cones is that they remove the hardest part—the actual rolling—leaving you free to focus on the simple, satisfying process of filling and packing. With LeafPalms natural, tobacco-free options, you’re not just filling a cone; you’re crafting a premium, health-conscious smoking experience.


How to Fill Pre-Rolled Cones: Complete Step-by-Step Guide
How to Pack a Pre-Rolled Cone?
To fill a pre-rolled cone: grind your material to medium consistency, hold the cone upright, add material in small amounts, gently tamp down every few pinches using a packing tool, continue layering and packing until ¼ inch from the top, then twist the end shut. The key is firm but not tight packing for optimal airflow and even burning.
Pre-rolled cones have revolutionized the smoking experience, eliminating the steep learning curve of traditional rolling while delivering consistent, professional results every time. Whether you’re a complete beginner or looking to perfect your technique, mastering the art of filling pre-rolled cones ensures smooth draws, even burns, and zero frustration.
At LeafPalms, we specialize in premium natural pre-rolled wraps, pre-rolled tubes, and pre-rolled cones made from tobacco-free materials like palm leaves, rose petals, and lotus flowers. This comprehensive guide will walk you through every step of the cone-filling process, from material preparation to the perfect twist, ensuring your smoking sessions are always smooth and satisfying.
Why Pre-Rolled Cones Are Game-Changers
The Convenience Revolution
Traditional hand-rolling requires practice, patience, and a steady hand—skills that can take months or even years to develop. Pre-rolled cones eliminate this barrier entirely, offering:
Zero Learning Curve – If you can fill, you can roll
Perfect Shape Every Time – Professionally crafted cone design
Built-In Filter – No need to fold or craft crutches
Consistent Burns – Even combustion from start to finish
Time-Saving – Fill and enjoy in under 2 minutes
Perfect for Sharing – Impressive presentation without the stress
Natural Materials Make the Difference
While standard paper cones serve their purpose, natural wraps like Rose Wraps, Lotus Cones, and Leaf Palms offer superior experiences:
Tobacco-Free – Zero nicotine, zero harsh chemicals
Slower Burning – Natural materials burn cooler and longer
Better Flavor – No paper taste interfering with your herbs
Eco-Friendly – Biodegradable and sustainably sourced
What You’ll Need: Essential Supplies
Before you begin, gather these items for the smoothest filling experience:
Required Materials:
Choosing Your Cone Style:
Popular Flavored Wraps:
Step 1: Prepare Your Material – The Foundation of Success
Achieving the Perfect Grind
The consistency of your ground material directly impacts how well your cone burns. Here’s the science behind the perfect grind:
TOO FINE (Powder-like)
Restricts airflow
Clogs the cone
Difficult to draw through
Can pull through a filter
TOO COARSE (Chunky)
Creates air pockets
Uneven burning
“Tunneling” effect
Harsh, hot smoke
JUST RIGHT (Medium/Fluffy)
Optimal airflow
Even, consistent burn
Smooth draws
Perfect pack density
Grinding Best Practices:
Moisture Matters:
Too Dry:
Too Moist:
Perfect Balance:
Pro Tip: If the material is too dry, add a humidity pack to your storage container for 24 hours. If too moist, spread on a tray for 10-15 minutes at room temperature.
Step 2: Set Up Your Workspace
Create a Spill-Free Zone:
Cone Preparation:
Before filling, inspect your pre-rolled cone:
Check for tears or damage
Ensure the filter is secure
Gently tap to open the cone fully
Verify paper is expanded to full diameter
For natural wraps like Rose Cuts or Fruit Cuts, handle gently as they’re more delicate than paper.
Step 3: The Filling Technique – Layer by Layer
The Professional Method:
This is where most beginners go wrong. Follow this proven technique for perfect results every time:
Phase 1: Initial Fill (Bottom Third)
Critical Rule: Never fill more than ⅓ at once before packing
Phase 2: Middle Fill (Middle Third)
The “Firm Pillow” Test: Press gently on the side—should give slightly but bounce back
Phase 3: Top Fill (Final Third)
Step 4: Perfect Packing Pressure
Understanding Pack Density:
The most common mistake is either under-packing or over-packing. Here’s how to nail it:
Under-Packed Symptoms:
Over-Packed Symptoms:
Perfect Pack Indicators:
Firm but not hard – Like a firm pillow
Smooth draw – Slight resistance but easy pull
No movement – Material doesn’t shift
Maintains shape – No dents from packing tool
Consistent density – Uniform from bottom to top
The Three-Finger Test:
Gently pinch the cone between three fingers along its length:
Step 5: Closing Your Cone – Two Professional Methods
Method 1: The Classic Twist (Easiest)
This is the standard approach used by 95% of smokers:
Perfect for: Quick sessions, immediate smoking, beginners
Works best with: Pre Rolled Tubes and Pre Rolled Cones
Method 2: The Dutch Crown (Premium Finish)
Professional-looking flat-top finish preferred by connoisseurs:
Perfect for: Storage, gifting, premium presentation, preventing “canoeing”
Easier lighting than twisted tops
Professional appearance
Better seal for long-term storage
Works best with: Rose Wraps and Lotus Cones
Pro Tip: Dutch crowns require firmer packing throughout—if packed loosely, you’ll have too much empty space at the top to fold properly.
Common Mistakes and How to Fix Them
Problem: Cone Won’t Stay Lit
Causes:
Solutions:
Problem: Burns Too Fast/Hot
Causes:
Solutions:
Problem: “Canoeing” (Uneven Burn)
Causes:
Solutions:
Problem: Harsh Smoke
Causes:
Solutions:
Problem: Material Falls Out
Causes:
Solutions:
Advanced Tips for Perfect Cones Every Time
The Pre-Fill Check:
Before you start filling:
✓ Tap test: Tap cone on surface—should maintain shape
✓ Draw test: Pull through empty cone—air should flow freely
✓ Inspect filter: Ensure it’s secure and properly seated
✓ Check material: Verify grind consistency and moisture
The Post-Fill Quality Control:
After filling but before closing:
✓ Roll test: Place on flat surface—should roll smoothly without wobbling
✓ Pinch test: Gently pinch along entire length—check for soft spots
✓ Draw test: Take 2-3 unlit pulls—should have slight resistance but easy flow
✓ Visual check: Look down from top—material should be level
Storage Tips for Pre-Filled Cones:
If you’re batch-filling bulk cones for later:
Short-term (1-7 days):
Long-term considerations:
Size Guide: Choosing the Right Cone
Different sizes require slightly different techniques:
Mini/Dogwalker Cones (0.3-0.5g)
Standard/1¼ Size (0.5-0.75g)
King Size (0.75-1.0g)
Extra Large (1.0g+)
Natural Wraps vs Paper Cones: Filling Differences
Special Considerations for Natural Wraps:
Leaf Palms (Palm Leaf):
Rose Palms & Rose Cuts:
Lotus Cones:
Fruit Cones & Fruit Cuts:
The Lighting Process: Final Step to Success
Even perfectly packed cones can be ruined by poor lighting technique:
Proper Lighting Method:
First-Burn Indicators:
Good Signs:
Warning Signs:
If you notice warning signs, use your lighter to even out the burn by applying flame to the slower-burning side.
Expert-Level Tips from the Pros
The Batch-Filling System:
If you’re filling multiple cones (great for parties or bulk preparation):
Temperature and Humidity Control:
Ideal Conditions:
The “Flavor Layering” Technique:
For advanced users wanting to enhance experience:
Bottom layer: Regular material
Middle layer: Add kief or concentrate
Top layer: Regular material (protects middle)
Works especially well with flavored options like Honey, Bubblegum, or Russian Cream wraps.
Using a Cone Loader (Optional Tool):
Commercial cone-filling machines exist for bulk operations, but for personal use:
DIY Loader:
Benefits:
Natural Wraps: Elevating Your Experience
While this guide applies to all pre-rolled cones, natural tobacco-free options from LeafPalms offer distinct advantages:
Why Choose Natural Over Paper:
Health Perspective:
Experience Quality:
Environmental Impact:
LeafPalms Product Recommendations by Experience Level:
Beginners: Start with Pre Rolled Cones in Lotus or mild flavors like Honey
Intermediate: Explore Rose Wraps in varieties like Strawberry or Mango
Advanced: Try Rose Cuts or Fruit Cuts for customizable rolling, or premium Leaf Palms for a purist experience
Flavor Enthusiasts: Experiment with bold options like Gummy Bear, Cool Mint, or Russian Cream
Frequently Asked Questions
How much material fits in a standard cone?
Standard 1¼ size cones typically hold 0.5-0.75g. King size cones hold 0.75-1.0g. Exact amount depends on grind consistency and pack density.
Can I reuse a cone if I empty it?
Not recommended. The paper/material becomes brittle and may tear. Always use fresh pre-rolled cones for best results.
What if I don’t have a packing tool?
Use a chopstick, bamboo skewer, or the end of a pen (remove ink cartridge first). Just ensure it’s clean and smooth.
How tight should I twist the end?
Just tight enough to seal—about 2-3 rotations. Over-twisting restricts airflow and makes lighting difficult.
Can I fill cones ahead of time?
Yes! Store in airtight containers in cool, dark places. Best consumed within 7 days for optimal freshness.
Why does my cone keep going out?
Usually due to: material too moist, packed too tight, or inconsistent density. Try repacking with drier material and less pressure.
What’s the best size cone for beginners?
Standard 1¼ size offers the best balance—large enough to work with comfortably but not so big that mistakes are costly.
Do natural wraps like Rose Palms require different techniques?
Slightly—they’re more delicate, so use gentler packing pressure. Otherwise, the same technique applies.
How do I prevent canoeing?
Ensure even packing throughout, rotate while packing, and light evenly by rotating the cone during ignition.
Can I mix different materials in one cone? Yes, but layer them: regular material on bottom and top, special additions (kief, concentrates) in the middle for best results.
Final Thoughts: Practice Makes Perfect
Mastering pre-rolled cone filling is a skill that improves with repetition. Your first few attempts might not be perfect, and that’s completely normal. The key is understanding the principles:
Remember the Core Concepts:
Medium grind consistency
Layer in small amounts
Pack gently as you go
Firm but not tight
Test airflow before closing
Whether you choose classic Pre Rolled Tubes, elegant Rose Palms, smooth Lotus Cones, or flavorful options like Blueberry and Strawberry, the filling technique remains fundamentally the same.
The beauty of pre-rolled cones is that they remove the hardest part—the actual rolling—leaving you free to focus on the simple, satisfying process of filling and packing. With LeafPalms natural, tobacco-free options, you’re not just filling a cone; you’re crafting a premium, health-conscious smoking experience.